Overview
Creating a CSV Table through the View Builder allows for:
- The table to be used across all Drag & Drop views based on the Source it was imported into
- The table to be used with other tables in the View, like a Virtual Table would be, rather than requiring the use of a Sub Query
- The fields to be formatted and categorised through the View Builder interface, the same as normal fields
Import through the View Builder
Complete the following steps to import a CSV file through the View Builder:
- Navigate to Administration > Source Systems & Views
- Click on the Add button situated below the list of Database Views

- Create a View using the Drag & Drop Editor, ensuring you select a Writable Data Source
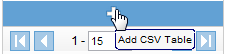
- On the first step of the View Builder you will notice there is now a blue bar at the bottom of the Database Tables list. Click on the bar in order to Add CSV Table
- You will now be on the CSV Import page. Click on the Choose File button and locate your data.
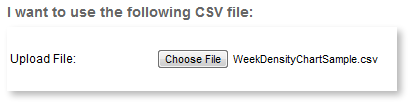
- Click the Continue button to upload

- Once the file has been uploaded, you will be shown a 10 row snapshot of the data and be required to define the following:
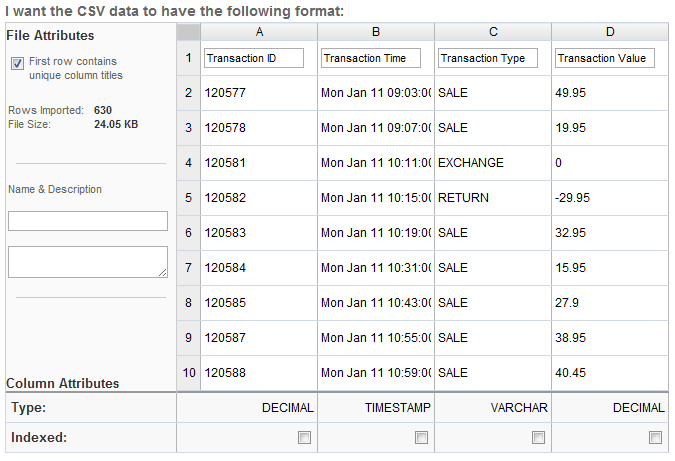
- Name: This will be the name of the Table that is created
- Description: The Business Description of the Table
- Column Titles: Names for each field in the View.
The First row contains unique column titles option on the left hand side of the page allows the user to either use the first row of the file to define column titles, or define their own (if no column titles are contained in the file). - Index: Identify which fields should be indexed in the table
- Click on the Continue button to create the table.
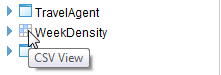
- The table will now be available in the Database Tables list with the CSV Table icon next to it.
- From here, the user can create their view as normal. Simply add a CSV Table the same way you would a normal database table, by dragging it onto the canvas.