Page History
| Anchor | ||||
|---|---|---|---|---|
|
| Table of Contents | ||
|---|---|---|
|
...
概要
| Styleclass | ||
|---|---|---|
|
...

...
ビューオプション
| Styleclass | ||
|---|---|---|
|
...
Optionオプション | Description説明 |
|---|---|
Name | Provide a Business Name for the View, which will be used to identify it during the Report Building process. |
Business Description | Provide a Business Description for the View, which will help the Report Writer understand the intended use and contents of the View. |
Technical Description | Provide a Technical Description for the View, which will help Administrators understand the design and purpose of the View. |
Audience | Provide an Audience Description to help identify who the View was designed for. |
View Category | Select a View Category. View Categories define which Field Categories are available in the second step of the builder. |
...
名前 | ビューの表示名を指定します。レポート作成プロセスでビューを特定するために使用されます。 |
ビジネス上の説明 | ビューの用途やコンテンツをレポート作成者が理解できるように、ビューの説明を指定します。 |
技術的な説明 | ビューの設計や目的を管理者が理解できるように、ビューの技術的な説明を指定します。 |
ヘルプ | ビューを誰のために設計したのかを特定できるように、対象の説明を指定します。 |
ビューカテゴリー | ビューカテゴリーを選択します。ビューカテゴリーは、ビルダーの2番目のステップで使用可能なフィールドカテゴリーを定義します。 |
パフォーマンス
| Styleclass | ||
|---|---|---|
|
...
Optionオプション | Description |
|---|---|
Default Cache Period (Hours) | Used to store queried data in a cache and reused by multiple report users. If the data in your source system is not time sensitive then you can set the cache time to be high and limit the impact of report users on the source system. |
View Row Limit | You can set the maximum row to be returned for any report written from this view. |
Optimise View | When enabled this will mean that Yellowfin will only include tables in report SQL that are being used within the report, or are set to Mandatory. |
Filter Text Suggestions | If enabled, this will allow certain fields to use the 'Filter Text Suggestions' functionality. See Field Access & Usage for more information. |
...
説明 | |
|---|---|
デフォルトキャッシュ期間 | 読み出されたデータを複数のユーザーが再利用できるようキャッシュに格納するために使われます。扱うデータの変動性が低ければ、キャッシュ期間を長く設定してソースシステムのアクセス負荷を軽減することができます。 |
ビューのロウ(行)の制限 | このビューから作成されるレポートのために読み出される最大のロウ(行)数を設定できます。 |
最適化ビュー | 有効にすると、Yellowfinはレポート内で使用されているか「必須」に設定されているレポートSQLにテーブルのみを含めます。 |
フィルターテキストの提案 | 有効にすると、特定のフィールドを「フィルターテキストの提案」機能で使用することができます。詳細については、フィールドアクセスと使用方法を参照してください。 |
ビューのセキュリティ
| Styleclass | ||
|---|---|---|
|
...
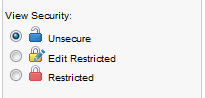
制限なし | データベース機能へのアクセス権を持つすべてのユーザーが、このビューを使ってレポートを作成できます。 |
編集の制限 | 指定されたユーザーのみが、このビューを使用してレポートを作成できます。他のすべてのユーザーはこのレポートの閲覧だけを許可されます。 |
制限あり | 指定されたユーザーだけが、このビューのデータからレポートを作成し、閲覧できます。 |
注意:このオプションはビュー自体の編集権限は制御しません。ビューにアクセスすることができるレポート作成者のみを制御します。
セキュリティの割り当て
- ビューオプションから「制限のあるオプション」を選択すると、セキュリティ管理ステップが追加されます。
- アクセス権を必要とするユーザーやグループを検索します。「検索」をクリックして、ユーザーまたはグループを選択してください。
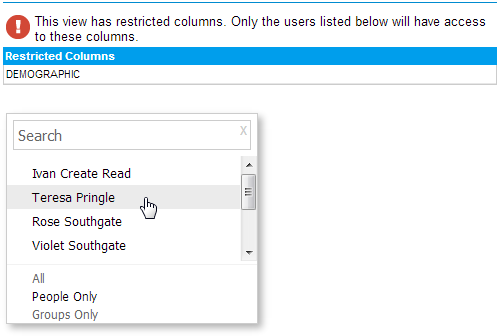
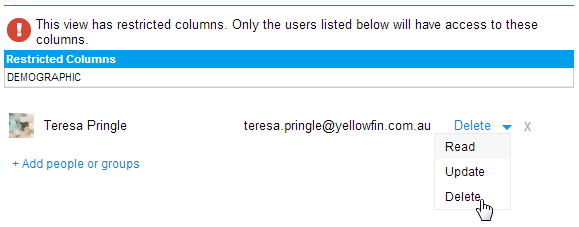
- アクセスレベルを選択します。
- 「追加」ボタンをクリックしてアクセス一覧に追加します。アクセス一覧には必要なだけ個人やグループを登録することができます。
Security on the view is used to set who has access to the view through the Report Builder, i.e. who can create/see reports based on the view. The three options available are:
Unsecure | All users with functional access to the database can write reports against this view. |
Edit restricted | Only defined users will be able to create a report using this view. All other users will be able to read the reports that have been created by authorised users. |
Restricted | Only defined users can read and/or write reports from data in this view. |
Note: these options do not control who can edit the view itself, they only control the Report Builder access to the view.
Assigning Security
- Once you have selected the ‘secure’ option from the view option the security management step will be displayed.
- You will need to search for which users or groups require access. Click the search link and select the user or group required.
- Select the appropriate access level.
- Click the add button to add them to the access list. You can add as many users or groups as users to the list as appropriate.
| horizontalrule |
|---|
| Styleclass | ||
|---|---|---|
|
...