Page History
...
| Table of Contents | ||
|---|---|---|
|
...
概要
| Styleclass | ||
|---|---|---|
| ||
Creating a CSV Table through the View Builder allows for:
- The table to be used across all Drag & Drop views based on the Source it was imported into
- The table to be used with other tables in the View, like a Virtual Table would be, rather than requiring the use of a Sub Query
- The fields to be formatted and categorised through the View Builder interface, the same as normal fields
ビュービルダーを使用してCSVテーブルを作成すると、以下が可能になります:
- テーブルは、テーブルのインポート先ソースを基盤とするすべてのドラッグ&ドロップビューにわたって使用できます。
- テーブルは、その他のテーブルと共に仮想テーブルと同様にビューで使用できます。サブクエリーを使用する必要はありません。
- フィールドは、ビュービルダーのインターフェースを通して、通常のフィールドと同様に書式設定され分類されます。
ビュービルダーを使用したインポート
...
| Styleclass | ||
|---|---|---|
| ||
Complete the following steps to import a CSV file through the View Builder:
ビュービルダーを使用してCSVファイルをインポートするには、以下の手順を実行します:
- 「管理」>「ソースシステム&ビュー」に移動します。
- 「データベースビュー」一覧の下にある「追加」ボタンをクリックします。

- ドラッグ&ドロップエディターを使用してビューを作成します。その際、「書き込み可能なデータソース」を選択していることを確認します。
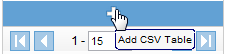
- ビュービルダーの最初のステップで、「データベーステーブル」一覧の下に青色のバーがあります。バーをクリックしてCSVテーブルを追加します。
- 「CSVからインポート」ページに自動的に移動します。「ファイルの選択」ボタンをクリックして、データを指定します。
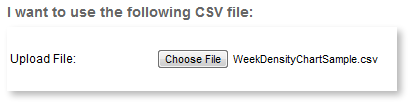
- 「続行」ボタンをクリックしてアップロードします。

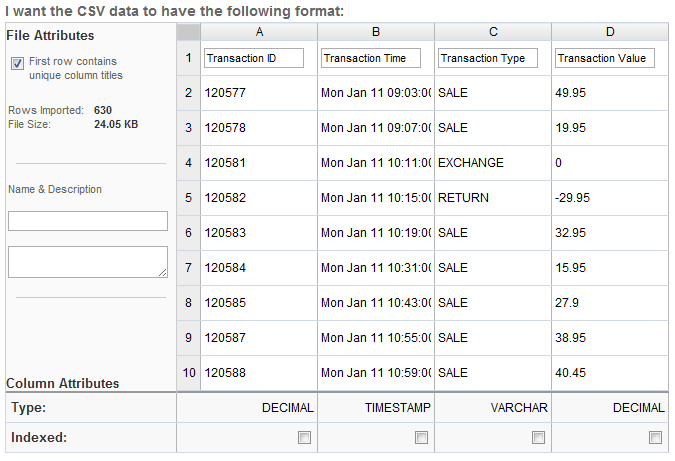
- ファイルがアップロードされたら、10行のデータのスナップショットが表示され、以下の項目の入力が求められます:
 ## 名前: 作成されるテーブルの名前を指定します。
 - 説明: テーブルの説明を入力します。
- カラム(列)タイトル: ビュー内の各フィールドの名前を入力します。
ページ左側の「最初のロウにはユニークなカラムタイトルが含まれる」オプションを使用して、ファイルの最初のロウを使用してカラムタイトルを指定するか、独自のカラムタイトルを指定するか(ファイルにカラムタイトルが含まれていない場合)を決定できます。 - インデックス: インデックス:テーブル内でインデックス化されるフィールドを指定します。
- 「続行」ボタンをクリックしてテーブルを作成します。
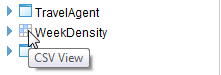
- これで、テーブルがデータベーステーブル一覧内で使用可能になり、CSVテーブルのアイコンが付加されます。
- この一覧から、ユーザーは通常どおり独自のビューを作成できます。通常のデータベーステーブルと同様に、CSVテーブルをキャンバスにドラッグしてテーブルを追加します。
- Navigate to Administration > Source Systems & Views
- Click on the Add button situated below the list of Database Views
- Create a View using the Drag & Drop Editor, ensuring you select a Writable Data Source
- On the first step of the View Builder you will notice there is now a blue bar at the bottom of the Database Tables list. Click on the bar in order to Add CSV Table
- You will now be on the CSV Import page. Click on the Choose File button and locate your data.
- Click the Continue button to upload
- Once the file has been uploaded, you will be shown a 10 row snapshot of the data and be required to define the following:
- Name: This will be the name of the Table that is created
- Description: The Business Description of the Table
- Column Titles: Names for each field in the View.
The First row contains unique column titles option on the left hand side of the page allows the user to either use the first row of the file to define column titles, or define their own (if no column titles are contained in the file). - Index: Identify which fields should be indexed in the table
- Click on the Continue button to create the table.
- The table will now be available in the Database Tables list with the CSV Table icon next to it.
- From here, the user can create their view as normal. Simply add a CSV Table the same way you would a normal database table, by dragging it onto the canvas.
| horizontalrule |
|---|
| Styleclass | ||
|---|---|---|
| ||