Page History
...
- Click on Create in order to start the Report Building process
- On the Report Initialisation page, select the CSV Import authoring option

- The following will now need to be defined;
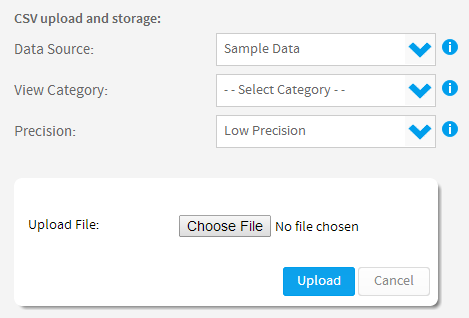
- Data Source: The user will need to select a writable data source to store the CSV data into.
Note: If the user does not have the Advanced CSV Functionality role permission, Yellowfin will select the Data Source marked as CSV Default. If no CSV Default was set the user will be alerted to contact their administrator. - View Category: This will be used when the view for this CSV import is generated, providing a list of available field categories.
- Precision: Defines how many rows in the file will be examined in order to determine the format of each field.
- Low Precision the first 1000 rows will be examined
- High Precision all rows will be examined, and as such could take a considerable amount longer to process
- Data Source: The user will need to select a writable data source to store the CSV data into.
- Lastly a CSV file needs to be selected and uploaded. Click on the Choose File button and locate the CSV.
- Click on the arrow Upload button to progress to the next import step.
- Once the file has been uploaded, you will be shown a 10 row snapshot of the data and be required to define the following:
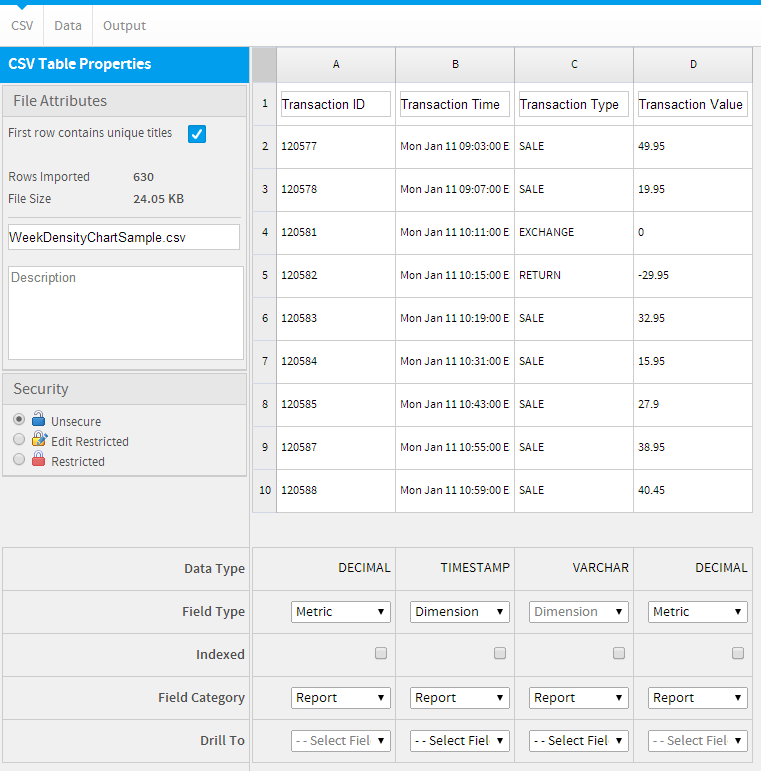
- Name: This will be the name of the View that is created
- Description: The Business Description of the View
- Column Titles: Names for each field in the View.
The First row contains unique column titles option on the left hand side of the page allows the user to either use the first row of the file to define column titles, or define their own (if no column titles are contained in the file). - Field Type: Define whether the field should be a Metric or Dimension
- Index: Identify which fields should be indexed in the table
- Category: The folder each field will be located in, within the View Definition
- Drill To: Define a drill hierarchy, selecting the field to be the next level down. Remember that only Dimension fields can be used in a hierarchy.
- Click on the arrow to progress to the main report builder. From here the user can create their report as normal.
...