Page History
...
| Table of Contents | ||
|---|---|---|
|
...
設定
| Styleclass | ||
|---|---|---|
| ||
...
Redshiftの設定
| Section | ||||||||||
|---|---|---|---|---|---|---|---|---|---|---|
|

...
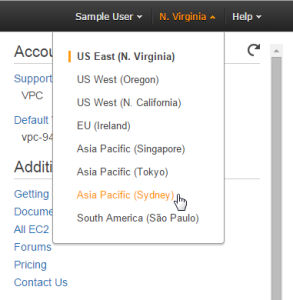
ロケーション
| Section | ||||||||||
|---|---|---|---|---|---|---|---|---|---|---|
|
...
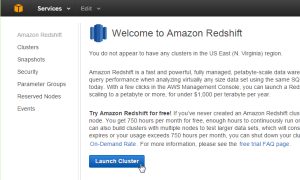
クラスターの作成
| Section | ||||||||||
|---|---|---|---|---|---|---|---|---|---|---|
|
...
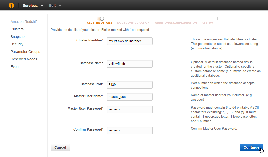
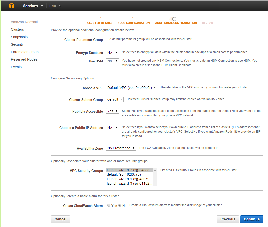
クラスターの詳細
| Section | ||||||||||
|---|---|---|---|---|---|---|---|---|---|---|
|
...
ノード設定
| Section | ||||||||||
|---|---|---|---|---|---|---|---|---|---|---|
|
...
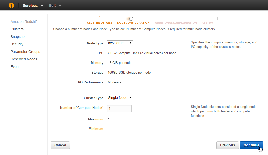
追加の設定
| Section | ||||||||||
|---|---|---|---|---|---|---|---|---|---|---|
|
...
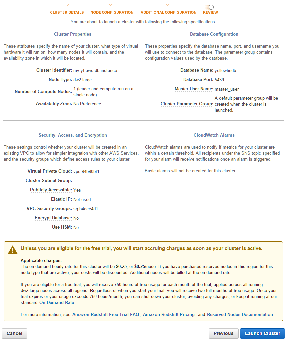
レビューと起動
| Section | ||||||||||
|---|---|---|---|---|---|---|---|---|---|---|
|
...
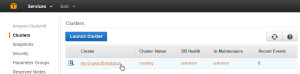
クラスターの表示
| Section | ||||||||||
|---|---|---|---|---|---|---|---|---|---|---|
|

...
クラスター名
| Section | ||||||||||
|---|---|---|---|---|---|---|---|---|---|---|
|
...
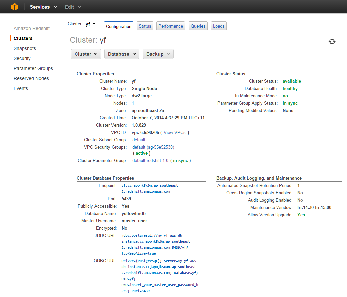
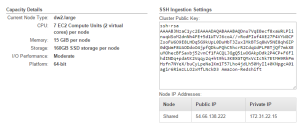
クラスターの詳細
| Section | ||||||||||
|---|---|---|---|---|---|---|---|---|---|---|
|
Yellowfin
| Styleclass | ||
|---|---|---|
| ||
...
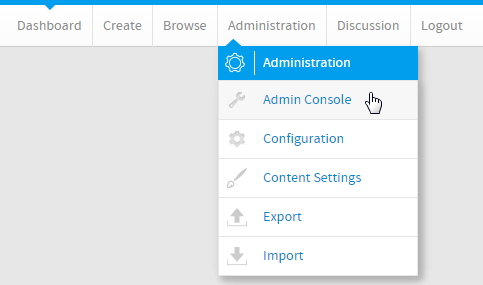
ログイン
| Section | ||||||||||
|---|---|---|---|---|---|---|---|---|---|---|
|
...
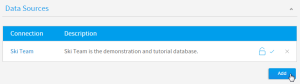
データソースの追加
| Section | ||||||||||
|---|---|---|---|---|---|---|---|---|---|---|
|
...
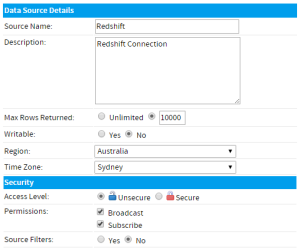
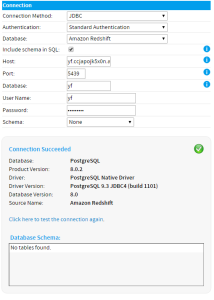
データソース詳細
| Section | ||||||||||
|---|---|---|---|---|---|---|---|---|---|---|
|
...
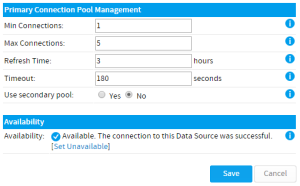
接続の詳細
| Section | ||||||||||
|---|---|---|---|---|---|---|---|---|---|---|
|
You are now ready to add data to your Cluster and build reports. これで、データをクラスターに追加してレポートを作成する準備が整いました。
| horizontalrule |
|---|
| Styleclass | ||
|---|---|---|
| ||