Page History
| Anchor | ||||
|---|---|---|---|---|
|
...
| Table of Contents | ||
|---|---|---|
|
はじめに
| Styleclass | ||
|---|---|---|
| ||
...
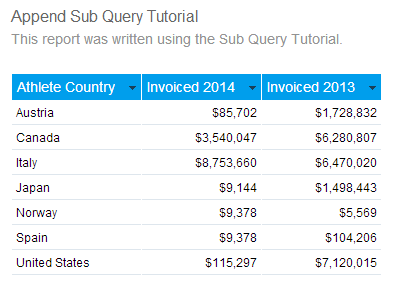
このチュートリアルでは、2年分の数値を比較するために追加サブクエリーを設定する処理を、段階的に説明します。
追加サブクエリーは、レポートのその他の部分とは異なるフィルターを必要とするカラム(列)をレポートに追加する場合に使用するものと考えるとよいでしょう。
このシナリオのメインレポートでは、2014年における国別の請求額を表示します。追加するカラム(列)は、2013年における請求額です。フィルターYear = 2014とYear = 2013が競合するため、追加を使用して別のカラム(列)を加える必要があります。
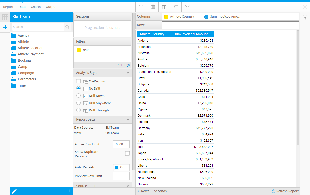
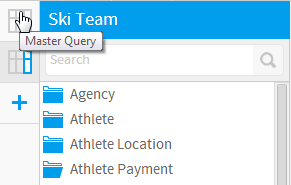
マスタークエリー
マスタークエリーには以下の項目を含めます:
- Athlete Country
- Sum Invoiced Amount
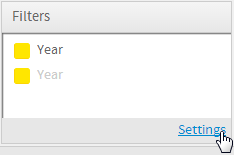
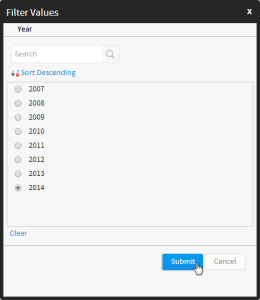
- フィルター: Year = 2014
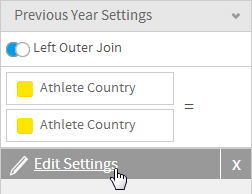
この場合、「Country」は2014年と2013年の共通フィールドであるため、追加を加えると結合が行われます。
注意:一部の国にはまだ2014年に対する結果が存在しないという理由などから、「Country」一覧を2014年でフィルタリングしたくない場合もあります。この場合は、マスタークエリーに「Country」を含め、それぞれの「Invoiced Amount」のために追加クエリーを使用します。
追加クエリー
追加クエリーには以下の項目を含めます:
- 結合:Athlete Country
- Sum Invoiced Amount
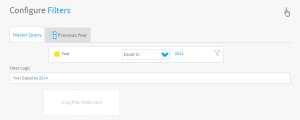
- フィルター:Year = 2013
この追加クエリーは、「Athlete Country」フィールドを使用してマスタークエリーに結合されます。クエリーはYear = 2013でフィルタリングされ、フィルター対象となる「Sum Invoiced Amount」フィールドのコピーがクエリーに組み込まれます。
初期化
| Styleclass | ||
|---|---|---|
| ||
| Section | ||||||||||
|---|---|---|---|---|---|---|---|---|---|---|
|
| Section | ||||||||||
|---|---|---|---|---|---|---|---|---|---|---|
|
| Section | ||||||||||
|---|---|---|---|---|---|---|---|---|---|---|
|
...
マスタークエリー
| Styleclass | ||
|---|---|---|
| ||
| Section | ||||||||||
|---|---|---|---|---|---|---|---|---|---|---|
|


追加クエリー
| Styleclass | ||
|---|---|---|
| ||
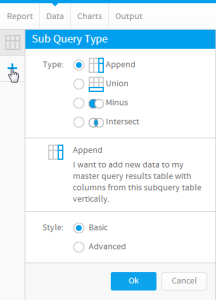
追加サブクエリーの作成
| Section | ||||||||||
|---|---|---|---|---|---|---|---|---|---|---|
|
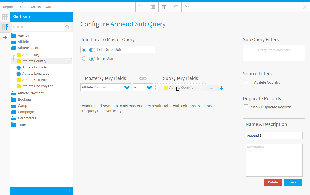
追加サブクエリーの結合
| Section | ||||||||||
|---|---|---|---|---|---|---|---|---|---|---|
|
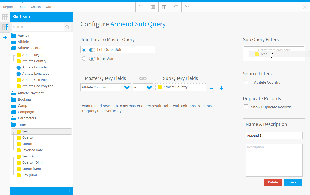
フィルター
| Section |
|---|
...
| ||
| ||
| ||
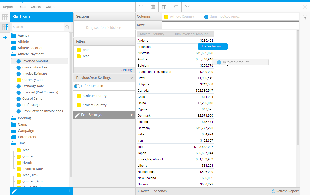
Create Append
Join Append
Filters
...
|
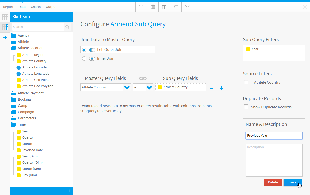
名前&保存
| Section | ||||||||||
|---|---|---|---|---|---|---|---|---|---|---|
|
カラムの追加
| Section | ||||||||||
|---|---|---|---|---|---|---|---|---|---|---|
|
設定の編集
| Section | |||||||||||
|---|---|---|---|---|---|---|---|---|---|---|---|
|
...
フィルターの適用
| Styleclass | ||
|---|---|---|
| ||
| Section | ||||||||||
|---|---|---|---|---|---|---|---|---|---|---|
|
| Section | ||||||||||
|---|---|---|---|---|---|---|---|---|---|---|
|
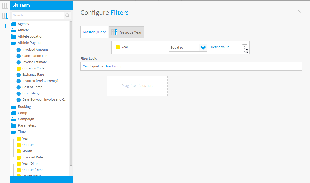
マスターフィルター
| Section | ||||||||||
|---|---|---|---|---|---|---|---|---|---|---|
|
| Section | |||||||||||
|---|---|---|---|---|---|---|---|---|---|---|---|
|
See Filters for more information.
Customisation
| Styleclass | ||
|---|---|---|
| ||
|
サブクエリーフィルター
| Section | ||||||||||
|---|---|---|---|---|---|---|---|---|---|---|
|
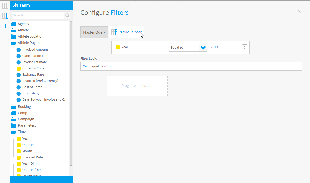
| Section | ||||||||||
|---|---|---|---|---|---|---|---|---|---|---|
|
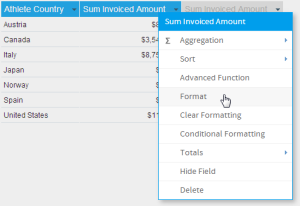
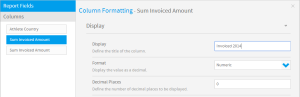
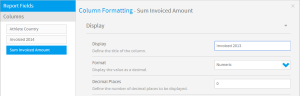
書式
| Styleclass | ||
|---|---|---|
| ||
| Section | ||||||||||
|---|---|---|---|---|---|---|---|---|---|---|
|
| Section | ||||||||||
|---|---|---|---|---|---|---|---|---|---|---|
|
| Section | ||||||||||||
|---|---|---|---|---|---|---|---|---|---|---|---|---|
|
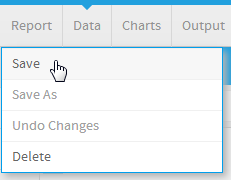
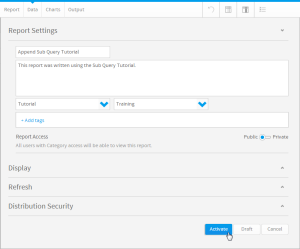
保存
| Styleclass | ||
|---|---|---|
| ||
| Section | ||||||||||
|---|---|---|---|---|---|---|---|---|---|---|
|
| Section | ||||||||||
|---|---|---|---|---|---|---|---|---|---|---|
|
See Formatting for more information.
|
| Section | ||||||||||
|---|---|---|---|---|---|---|---|---|---|---|
|
| horizontalrule |
|---|
| Styleclass | ||
|---|---|---|
| ||