Page History
| Anchor | ||||
|---|---|---|---|---|
|
| Table of Contents | ||
|---|---|---|
|
...
概要
| Styleclass | ||
|---|---|---|
|
...
Once a view has been defined either through the View Builder, SQL clause or straight from the database you will need to define the field definitions and apply business metadata to them.
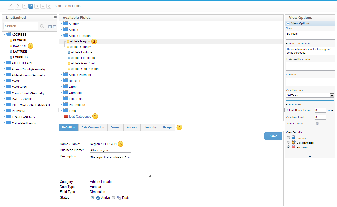
- Each field originally selected will initially be unattached. The process of adding columns to the view requires that metadata be applied. Drag columns from the unattached table list to the folders you wish to apply them to.
- Fields are categorised into folders. These folders are related to the view category. The purpose of this is to assist end users to find the columns they require. Columns displayed in the list provide some indication of their metadata, such as; hierarchies, dimensions or metrics, and business name.
- Click the edit category link to create or delete categories for the current view type.
- On the field edit section a set of tabs provides reference to the metadata and business logic you can apply.
- The definition tab allows you to change the Business Name and Description of the column, as well as setting it to metric/dimension and active/draft.
...
- すべてのカラムは最初、ビューに結合されていません。カラムをビューに加えるには、まずメタデータを作成し、適当なフォルダーに分類します。未結合のテーブル一覧から適用先のフォルダーにカラムをドラッグします。
- フィールドは、フォルダーに分類されます。この分類はビューカテゴリーに関連付けされており、エンドユーザーが必要なカラムを見つけるのに役立ちます。表示されるカラム名をクリックすると、階層やフィールドの種類、表示名などのメタデータを編集できます。
- 現在のビュータイプでカテゴリーを作成したり削除したりするには「カテゴリーの編集」をクリックします。
- 編集画面にはフィールドのメタデータを作成するために「定義」、「書式」、「アクセス」、「階層」のタブが用意されています。
- 「定義」タブでは、カラムの表示名と説明を変更し、メトリック/ディメンション(次元)と有効/ドラフト(編集中)に設定できます。
ビューフィールドの定義
| Styleclass | ||
|---|---|---|
|
...
フィールドの有効化
未結合のフィールドは、「未結合のフィールド」一覧にソーステーブルのフォルダーでグループ化されています。フィールド名をクリックしたまま、適したフォルダーにドラッグしてください。
注意:ビューには、同じフィールドを何度でも追加することができます。複数の階層で同じフィールドを使用したいときや、異なる書式を同じフィールドに適用したい場合に便利です。
同じフィールドを複数回追加する場合、「表示名」「説明」は異なるようにしてください。これはYellowfinが、インポートとエクスポートの操作時にフィールドを区別できるようにするためです。
フィールドのメタデータ
フィールドをレポート作成のために使用するには、まずそれらをビュー内で定義する必要があります。データベースから獲得可能な情報は、自動的にフィールド定義に読み込まれますが、ここで加えなければならないものもあります。
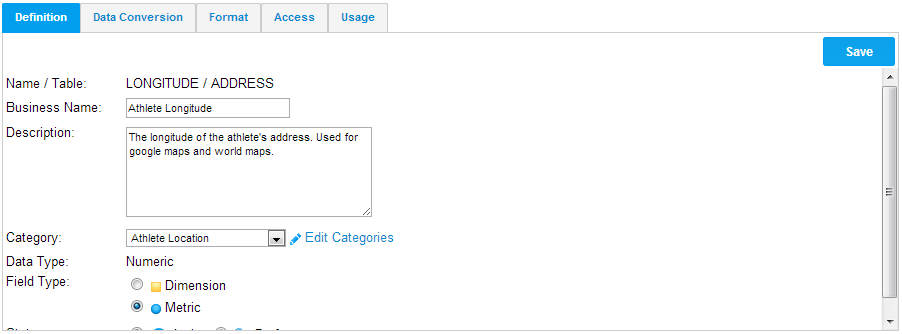
- メインフォルダーセクションにフィールドを追加したら、フィールド名をダブルクリックして「編集」タブを開きます。
- フィールドの表示名を入力します。レポートではこの名称が使われます。
- フィールドのカテゴリーを選択します。このカテゴリーはレポートデータ画面においてフィールドを論理的グループに分類するのに使われます。新しいグループが必要な場合は、「カテゴリーの編集」をクリックします。
- フィールドのタイプ(ディメンション(次元)あるいはメトリック(数値))を指定します。それが可能な場合、Yellowfinはフィールドタイプに基づいてタイプを自動的に割り当てます。たとえば、フィールドが数値であれば、フィールドのタイプは自動的にメトリック(数値)となります。
A major process of setting up a new view and creating meta data is column definition. Using Yellowfin you can give columns sourced from your database business terminology or create new columns derived from data included in the view. This section includes information on managing and updating the columns included in your view.
Making Fields Available for Reporting
Unattached fields are grouped into their source table folders in the Unattached Field list. Click on the field name and drag it into the appropriate folder.
Note: You can add the same field multiple times into your view. This is useful if you wish to use the same field in multiple hierarchies or with different formatting applied.
If you do add the same field multiple times ensure that the business descriptions are unique – since Yellowfin needs to be able to differentiate the fields during import and export processes.
Field Meta Data
Each field has to be defined in your view prior to it being used for report generation. Some of the field information is automatically loaded into the field list from the database but additional information is required.
- Once a field has been added into the main folder section double click the field name to open the edit tabs.
- Give the field a business name – this is the name displayed on the report.
- Add the field to a category – this is used on the report data page to group fields into logical groups. If you need new groups click the edit category link.
- Determine the type of field that it is – dimension or measure. Yellowfin will automatically allocate a type based on the type of field that the column is in the database. For example if the field is a numeric then Yellowfin will default the meta-data type to a metric.
| horizontalrule |
|---|
| Styleclass | ||
|---|---|---|
| ||
...