Page History
| Anchor | ||||
|---|---|---|---|---|
|
...
概要
| Styleclass | ||
|---|---|---|
| ||
During the import process, Yellowfin create's a View based on the CSV file. This allows an administrator to edit the fields step of the view; categorising, formatting, and creating hierarchies. The view can then be reused for other reports.
...
Yellowfinは、インポートプロセス中にCSVファイルに基づいてビューを作成します。これによって、管理者はビューのフィールドステップを編集できます。つまり、分類、書式設定、および階層の作成を実行できます。その後、そのビューを他のレポートで再利用できます。
レポートビルダーによるインポート
| Styleclass | ||
|---|---|---|
| ||
- Click on Create in order to start the Report Building process
- On the Report Initialisation page, select the CSV Import authoring option

- The following will now need to be defined;
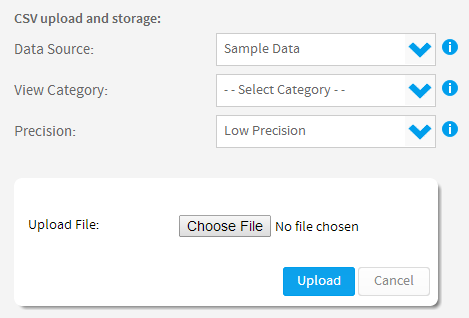
- Data Source: The user will need to select a writable data source to store the CSV data into.
Note: If the user does not have the Advanced CSV Functionality role permission, Yellowfin will select the Data Source marked as CSV Default. If no CSV Default was set the user will be alerted to contact their administrator. - View Category: This will be used when the view for this CSV import is generated, providing a list of available field categories.
- Precision: Defines how many rows in the file will be examined in order to determine the format of each field.
- Low Precision the first 1000 rows will be examined
- High Precision all rows will be examined, and as such could take a considerable amount longer to process
- Data Source: The user will need to select a writable data source to store the CSV data into.
- Lastly a CSV file needs to be selected and uploaded. Click on the Choose File button and locate the CSV.
- Click on the arrow to progress to the next import step.
- Once the file has been uploaded, you will be shown a 10 row snapshot of the data and be required to define the following:
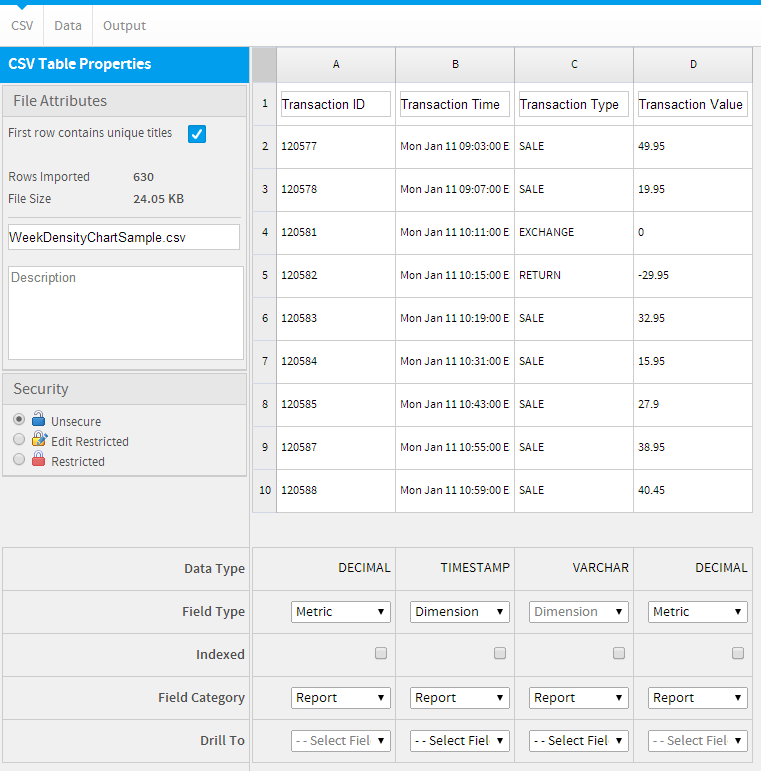
- Name: This will be the name of the View that is created
- Description: The Business Description of the View
- Column Titles: Names for each field in the View.
The First row contains unique column titles option on the left hand side of the page allows the user to either use the first row of the file to define column titles, or define their own (if no column titles are contained in the file). - Field Type: Define whether the field should be a Metric or Dimension
- Index: Identify which fields should be indexed in the table
- Category: The folder each field will be located in, within the View Definition
- Drill To: Define a drill hierarchy, selecting the field to be the next level down. Remember that only Dimension fields can be used in a hierarchy.
- Click on the arrow to progress to the main report builder. From here the user can create their report as normal.
View Security
Security on the view is used to set who has access to the view through the Report Builder, i.e. who can create/see reports based on the view. The three options available are:
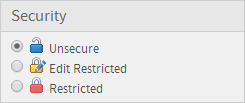
Unsecure | All users with functional access to the database can write reports against this view. |
Edit restricted | Only defined users will be able to create a report using this view. All other users will be able to read the reports that have been created by authorised users. |
Restricted | Only defined users can read and/or write reports from data in this view. |
Note: these options do not control who can edit the view itself, they only control the Report Builder access to the view.
- レポート作成プロセスを開始するため「作成」をクリックします。
- 「新規レポート作成」ページで「CSVからインポート」作成オプションを選択します。
- 以下を定義する必要があります:
- データソース: CSVデータの保存先となる書き込み可能なデータソースを選択する必要があります。
注意: ユーザーに高度なCSV機能ロール権限がない場合は、YellowfinによってCSVデフォルトとしてマークされたデータソースが選択されます。CSVデフォルトが設定されていない場合は、管理者に問い合わせるようにアラートが表示されます。 - ビューカテゴリー:これは、このCSVインポートのビューを生成するときに使用され、使用可能なフィールドカテゴリーの一覧を提供します。
- 精度:各フィールドの書式を決定するために調べるファイル内の行数を定義します。
- 低精度 最初の1000行を調べます。
- 高精度 すべての行を調べます。処理にかなり長い時間がかかることがあります。
- データソース: CSVデータの保存先となる書き込み可能なデータソースを選択する必要があります。
- 最後にCSVファイルを選択してアップロードする必要があります。「ファイルの選択」をクリックし、CSVを特定します。
- 「アップロード」ボタンをクリックして、次のインポートステップに進みます。
- ファイルがアップロードされると、10行のデータのスナップショットが表示されます。以下を定義する必要があります:
- 名前:作成するビューの名前。
- 説明:ビューの説明。
- カラムタイトル: ビューの各フィールドの名前。
ページ左側の「最初のロウにはユニークなカラムタイトルが含まれる」オプションを使用して、ファイルの最初のロウを使用してカラムタイトルを指定するか、独自のカラムタイトルを指定するか(ファイルにカラムタイトルが含まれていない場合)を決定できます。 - フィールドタイプ:フィールドが「メトリック」であるか「ディメンション」であるかを定義します。
- インデックス:テーブル内でインデックス化されるフィールドを指定します。
- カテゴリー:ビュー定義内で各フィールドが配置されるフォルダー。
- ドリルダウン先:ドリル階層を定義し、次の下位レベルとなるフィールドを選択します。階層内では「ディメンション」フィールドしか使用できない点を忘れないでください。
- 矢印をクリックして、メインレポートビルダーに進みます。ここで、通常どおりにレポートを作成できます。
ビューのセキュリティ
ビューに関するセキュリティは、ビューにアクセスできるメンバーを制限するために使用します。たとえば、ビューごとにレポートを作成または閲覧できるユーザーを制限します。以下の3つのオプションが指定できます:
制限なし | データベース機能へのアクセス権を持つすべてのユーザーが、このビューを使ってレポートを作成できます。 |
編集の制限 | 指定されたユーザーのみが、このビューを使用してレポートを作成できます。他のすべてのユーザーはこのレポートの閲覧だけを許可されます。 |
制限あり | 指定されたユーザーだけが、このビューのデータからレポートを作成し、閲覧できます。 |
注意: このオプションはビュー自体の編集権限は制御しません。ビューにアクセスするレポートビルダーのみを制御します。
ビューオプションから「制限のあるオプション」を選択すると、「アクセス」ボタンが追加されます。
- アクセス権を必要とするユーザーやグループを検索します。「検索」をクリックして、ユーザーまたはグループを選択してください。
- アクセスレベルを選択します。
- 「追加」ボタンをクリックしてアクセス一覧に追加します。アクセスリストには必要なだけ個人やグループを登録することができます。
- Once you have selected the 'secure' option from the view option the Access button is displayed.
- You will need to search for which users or groups require access. Click the search link and select the user or group required.
- Select the appropriate access level.
- Click the add button to add them to the access list. You can add as many users or groups as users to the list as appropriate.
| horizontalrule |
|---|
| Styleclass | ||
|---|---|---|
| ||