Page History
...
| Table of Contents | ||
|---|---|---|
|
...
概要
| Styleclass | ||
|---|---|---|
| ||
You can add comments to a report or Storyboard either for your own use or to share with others that have access to the same report. Comments can be used to provide a greater level of insight or used to discuss and highlight the data contained in a report or slide.
Note: Comments can only be added to Active content.
...
個人用、あるいは他のユーザーと共有しているレポートまたはストーリーボードに対して、コメントを追加することができます。コメントは、より高いレベルの分析結果を知らしめたり、レポートやスライドに含まれるデータについて議論し注意を喚起したりするために使用されます。
注意:有効化されているコンテンツにのみコメントを追加できます。
新規コメントスレッドの追加
| Styleclass | ||
|---|---|---|
| ||
- 新規コメントを追加するには、コメントパネルの「
 」ボタンをクリックします。画面右側のパネルが展開します。
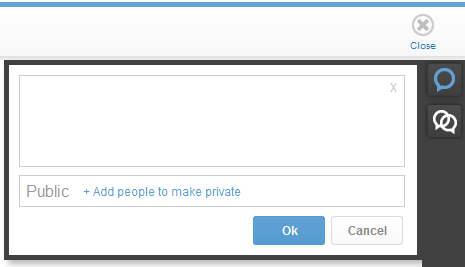
- 表示されたテキストボックスにコメントを入力します。
- 必要なセキュリティ設定を適用します。下記参照
- コメントおよびその権限を設定したら、「Ok」ボタンをクリックしてコメントを保存するか、「キャンセル」をクリックして削除します。
- To add new comments click the button in the Comments panel. This will expand the panel on the right of your screen.
- Enter your comment in the text box that has opened.
- Apply any security settings required See Below
- Once you're happy with your comment and its permissions, click on the Ok button to save the comment, or the Cancel to delete it.
| Anchor | ||||
|---|---|---|---|---|
|
Setting the Thread to Private
Comments are set to be Public by default. In order to restrict visibility of your comment, complete the following:
- Click on the + Add people to make private link.
- From here you are able to search through Yellowfin users & groups, to narrow this down you can:
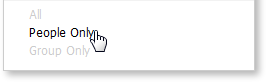
- Click on the People Only or Group Only option
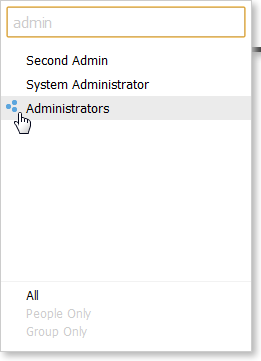
- Enter a search term in order to locate a user or group allowed to view your comment. You will notice that groups have this
 symbol next to them.
- Click on the People Only or Group Only option
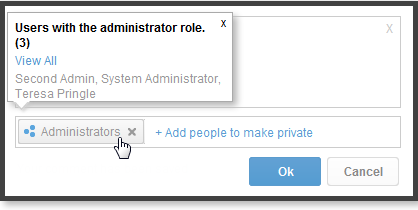
- Click on the name/group you wish to add and continue until you have all the users required. Note: all users that have been added to a private thread will be emailed a notification and provided with a link to view the content.
スレッドを個人用に設定
コメントは、デフォルトで共有に設定されています。コメントの表示を制限するには、次の手順を実行します:
- 「+ ユーザーを追加して個人用にする」リンクをクリックします。
- ここからは、Yellowfinのユーザーおよびグループを検索することができます。絞り込むには、次のようにします:
- 「ユーザーのみ」または「グループのみ」オプションをクリックします。
- コメントの表示を許可するユーザーまたはグループを検索するために、検索語句を入力します。グループの横には、「 」という記号がついています。
- 「ユーザーのみ」または「グループのみ」オプションをクリックします。
- 追加する名前/グループをクリックし、必要なすべてのユーザーを選択するまで続けます。注意:個人用スレッドに追加されたすべてのユーザーに対して、電子メールで通知が送信され、コンテンツを表示するためのリンクが提供されます。
注意:一覧にグループを追加すると、グループをクリックしてそのグループに属するユーザーを表示できます。Note: Once you have added a group to the list, you are able to click on that group in order to see the users that belong to it.
| Anchor | ||||
|---|---|---|---|---|
|
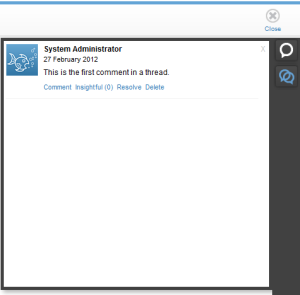
View Comments
| Styleclass | ||
|---|---|---|
| ||
If comments exist for a report there will be a  View Comments shortcut displayed under the tool bar. You can also click on the
  button in the Comments Panel on the right of the content to expand it and view all comments.
Viewing Users of a Private Thread
Once a Private Comment Thread has been created, the author and participants are able to view a list of users & groups with access to the thread.
- View the Comments See Above
- If you have access you a Private Thread, you will notice there is a Private link at the top of the root comment. Click on the link to see a light box with the thread members listed.
Mark Thread as Insightful
When viewing Comments it can be useful to know what other users have found beneficial, especially when there have been several comment threads created on a single report or slide. To do this:
- View the Comments See Above
- Click on the Insightful(0) link on the root comment. Your opinion will have been added to the tally.
Respond to a Comment Thread
| Styleclass | ||
|---|---|---|
| ||
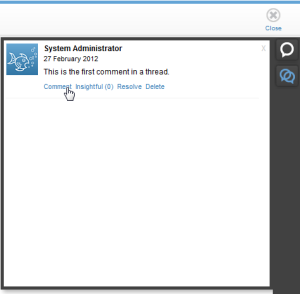
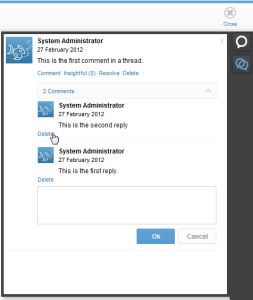
In order to respond to a comment, you will first need to view the comments. (See above).
- Click on the Comment link directly under the root comment of a thread. Alternatively, if there are already replies, you can click on the
 icon to expand the replies and open the response box.
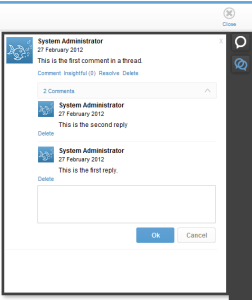
- Enter your reply into the text box and click the Ok button to submit, or click the Cancel button to clear your response.
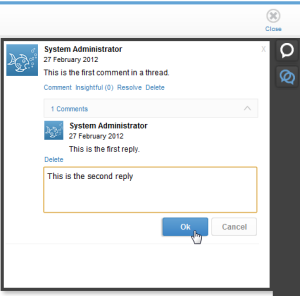
- Your reply should now be displayed directly below the root comment, as it is the most recent response.
Delete a Response
| Styleclass | ||
|---|---|---|
| ||
In order to remove a response, you will either need to be the author of the reply, or have the required administration role permissions.
- You will need to view the comments panel (see above).
- Locate the response you wish to delete.
- Click on the Delete link below the reply, it will now be removed from the list.
Delete a Comment Thread
| Styleclass | ||
|---|---|---|
| ||
In order to remove a thread, you will either need to be the author or the root comment, or have the required administration role permissions.
- You will need to view the comments panel (see above).
- Locate the thread you wish to delete.
- Click on the Delete link below the root comment, it will now be removed from the list, along with all responses.
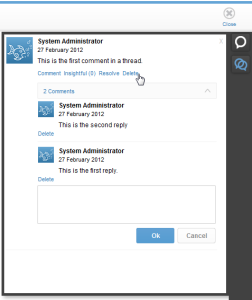
Mark a Thread as Resolved
| Styleclass | ||
|---|---|---|
| ||
When the issue or discussion raised in the Root Comment has been addressed, the creator of the thread has the option to mark the thread as Resolved by clicking on the Resolve link. This leaves the thread open for further discussion.
...
| horizontalrule |
|---|
| Styleclass | ||
|---|---|---|
| ||