Page History
...
| Table of Contents | ||
|---|---|---|
|
...
概要
| Styleclass | ||
|---|---|---|
| ||
When translating individual pieces of content, it's important to remember that this process is less flexible as it doesn't allow the user to select languages to translate, or the content status (all, changed, none - untranslated). You can translate three different levels of content individually; Views, Reports, and Dashboards. This process will always export all text to be translated for the selected content, for all available languages, and will include any previous translations in the file.
コンテンツの個々の部分を翻訳する場合、このプロセスではユーザーが翻訳する言語またはコンテンツステータス(「すべて」、「変更済み」、「何もなし」-未翻訳)を選択できないため、柔軟性に欠ける点に留意する必要があります。ビュー、レポート、ダッシュボードといった3つの異なるレベルのコンテンツを個々に翻訳できます。このプロセスでは常に、選択されたコンテンツですべての使用可能な言語に翻訳されたテキストがすべてエクスポートされ、それ以前の翻訳がすべてファイルに含まれます。
ビューの翻訳
...
| Styleclass | ||
|---|---|---|
| ||
- Open the View you wish to translate by navigating to Administration > Source Systems & Views, and selecting it from the list.
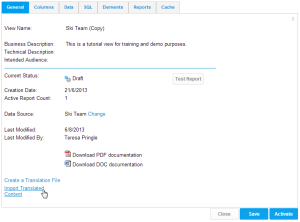
- Place the View in draft mode and navigate to the final step of the builder - View Summary.
- Click on the Create a Translation File link located in the bottom left corner of the General tab.

- A CSV file will now be generated containing all the View related text. Follow standard browser settings to save and open the file.
- Update the CSV with the required translations
- You will need to navigate to the View Summary page if you have moved away, and click on the Import Translated Content link.
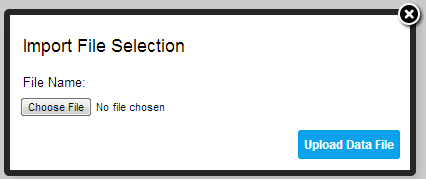
- Locate your translated CSV and click the Upload Data File button
- Yellowfin will now display one of the following validation messages when
- Your translation CSV upload is successful

- There is an error in your CSV file, or an unsupported file type was used

- One of the language column headers was changed and is not supported, in the example below en_au was changed to australian which is not a valid language code

- Either the order of the standard (first four) columns has been altered or there is no language column

- The CSV file was empty, or no file was selected

- Your translation CSV upload is successful
- 「管理」>「ソースシステム&ビュー」に移動し、一覧から翻訳するビューを選択して開きます。
- ビューをドラフト(編集中)モードにし、ビルダーの最終ステップである「ビューサマリー」に移動します。
- 「全般」タブの左下隅にある「翻訳ファイルの作成」リンクをクリックします。
- これでビュー関連のテキストをすべて含むCSVファイルが生成されます。標準のブラウザー設定に従い、ファイルを保存し開きます。
- CSVを必要な翻訳で更新します。
- 別のページにいる場合は「ビューサマリー」ページに移動し、「翻訳されたコンテンツをインポート」リンクをクリックします。
- 翻訳されたCSVを検索し、「データファイルのアップロード」ボタンをクリックします。
- ここで、次のいずれかの状況に応じた検証メッセージが表示されます。
- 翻訳CSVが正常にアップロードされた場合
- CSVファイル内にエラーがあるか、サポートされていないファイルタイプが使用された場合
- 変更された言語カラムヘッダーのいずれかがサポートされていない場合。下の例では、en_auが有効な言語コードでないaustralianに変更されていました。
- 標準(最初の4つ)のカラムの順序が変更されたか、言語カラムがない場合
- CSVファイルが空であったか、ファイルが選択されなかった場合
- 翻訳CSVが正常にアップロードされた場合
レポートの翻訳
...
| Styleclass | ||
|---|---|---|
| ||
- Open the Report you wish to translate by locating it in the Report List.
- Place the Report in draft mode by clicking Edit > Format
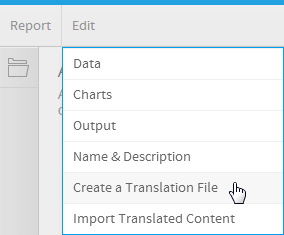
- Click on the Edit button again, this time selecting the Create a Translation File option
- A CSV file will now be generated containing all the customised Report related text.
Follow standard browser settings to save and open the file.
Note: when exporting report translations, only text that has been customised in the report builder (since the view) will be included in the file. The report will inherit all other text from the view and as such, the view should also be translated. If there are no translations available, the original text will be used. - Update the CSV with the required translations
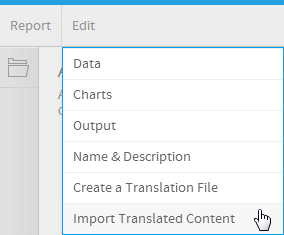
- You will need to navigate to the Report Preview page if you have moved away, and click Edit > Import Translated Content.
- Locate your translated CSV and click the Upload Data File button
- Yellowfin will now display one of the following validation messages when
- Your translation CSV upload is successful
- There is an error in your CSV file, or an unsupported file type was used
- One of the language column headers was changed and is not supported, in the example below en_au was changed to australian which is not a valid language code
- Either the order of the standard (first four) columns has been altered or there is no language column
- The CSV file was empty, or no file was selected
- Your translation CSV upload is successful
...
- 「レポート一覧」で翻訳するレポートを検索して開きます。
- 「編集」>「書式」をクリックしてレポートをドラフト(編集中)モードにします。
- 再度「編集」ボタンをクリックして、今度は「翻訳ファイルの作成」オプションを選択します。
- これでカスタマイズされたレポート関連のテキストをすべて含むCSVファイルが生成されます。
標準のブラウザー設定に従い、ファイルを保存し開きます。
注意: レポートの翻訳をエクスポートする場合は、(ビュー以降に)レポートビルダー内でカスタマイズされたテキストのみがファイルに含まれます。レポートはビューからの他のすべてのテキストを継承するため、ビューも翻訳する必要があります。使用可能な翻訳がない場合は、オリジナルのテキストが使用されます。 - CSVを必要な翻訳で更新します。
- 別のページにいる場合は「レポートプレビュー」ページに移動し、「編集」>「翻訳されたコンテンツをインポート」をクリックします。
- 翻訳されたCSVを検索し、「データファイルのアップロード」ボタンをクリックします。
- ここで、次のいずれかの状況に応じた検証メッセージが表示されます。
- 翻訳CSVが正常にアップロードされた場合
- CSVファイル内にエラーがあるか、サポートされていないファイルタイプが使用された場合
- 変更された言語カラムヘッダーのいずれかがサポートされていない場合。下の例では、en_auが有効な言語コードでないaustralianに変更されていました。
- 標準(最初の4つ)のカラムの順序が変更されたか、言語カラムがない場合
- CSVファイルが空であったか、ファイルが選択されなかった場合
- 翻訳CSVが正常にアップロードされた場合
ダッシュボードタブの翻訳
| Styleclass | ||
|---|---|---|
| ||
- 「ダッシュボード」で翻訳するタブを検索して開きます。
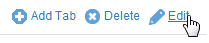
- 「編集」ボタンをクリックしてレポートをドラフト(編集中)モードにします。
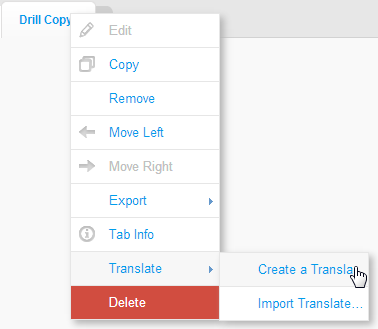
- タブのドロップダウンメニューをクリックして、「翻訳」>「翻訳ファイルの作成」オプションを選択します。
- これでタブ関連のテキストをすべて含むCSVファイルが生成されます。
標準のブラウザー設定に従い、ファイルを保存し開きます。
注意:ダッシュボードの翻訳をエクスポートする場合は、タブまたはそのフィルターに固有のテキストのみが含まれます。タブはビューから継承されたレポート内のテキストを継承するため、レポートとビューも翻訳する必要があります。 - CSVを必要な翻訳で更新します。
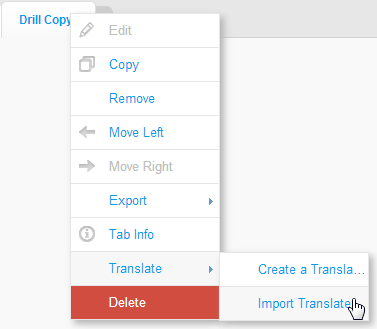
- 別のページにいる場合は「タブ」ページに移動し、「編集」>「翻訳されたコンテンツをインポート」をクリックします。
- 翻訳されたCSVを検索し、「データファイルのアップロード」ボタンをクリックします。
- ここで、次のいずれかの状況に応じた検証メッセージが表示されます。
- 翻訳CSVが正常にアップロードされた場合
- CSVファイル内にエラーがあるか、サポートされていないファイルタイプが使用された場合
- 変更された言語カラムヘッダーのいずれかがサポートされていない場合。下の例では、en_auが有効な言語コードでないaustralianに変更されていました。
- 標準(最初の4つ)のカラムの順序が変更されたか、言語カラムがない場合
- CSVファイルが空であったか、ファイルが選択されなかった場合
- 翻訳CSVが正常にアップロードされた場合
- Open the Tab you wish to translate by locating it on the Dashboard.
- Place the Report in draft mode by clicking the Edit button
- Click on the tab drop down menu and select the Translate > Create a Translation File option
- A CSV file will now be generated containing all the Tab related text.
Follow standard browser settings to save and open the file.
Note: when exporting dashboard translations, only text that is specific to the tab or its filters will be included. The tab inherits text in reports which inherit from the view and as such, the reports and view should also be translated. - Update the CSV with the required translations
- You will need to navigate to the Tab if you have moved away, and click Translate > Import Translated Content.
- Locate your translated CSV and click the Upload Data File button
- Yellowfin will now display one of the following validation messages when
- Your translation CSV upload is successful
- There is an error in your CSV file, or an unsupported file type was used
- One of the language column headers was changed and is not supported, in the example below en_au was changed to australian which is not a valid language code
- Either the order of the standard (first four) columns has been altered or there is no language column
- The CSV file was empty, or no file was selected
- Your translation CSV upload is successful
| horizontalrule |
|---|
| Styleclass | ||
|---|---|---|
| ||