30日間の無料評価版をお試しいただけます。

Versions Compared

Key

  • This line was added.
  • This line was removed.
  • Formatting was changed.

...

Expand
titleClick to Expand Instructions

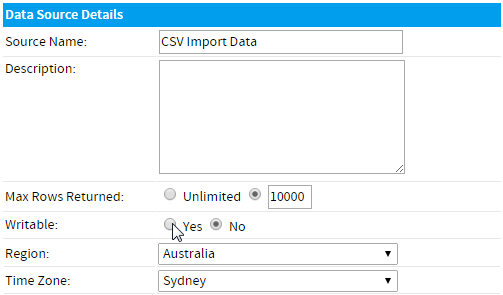
In order to define a writable connection, complete the following:

  1. Navigate to Administration > Admin Console.
  2. Expand the Data Sources section of the Admin Console main panel.
  3. If you already have a connection defined that you wish to set to writable, simply click on the connection name, otherwise create a new connection by clicking the Add button.
  4. In the Data Source Details section of the connection setup, set the Writable option to Yes.
  5. In the case that a user has permission to import a CSV, but not permission to access the advanced options, they will need there to be a writable source connection that has been set to the CSV Default so Yellowfin knows which connection to select for them. If this is the case for some of the users in the system, set the CSV default to Yes.
  6. Complete the process by clicking the Save button at the bottom of the page.

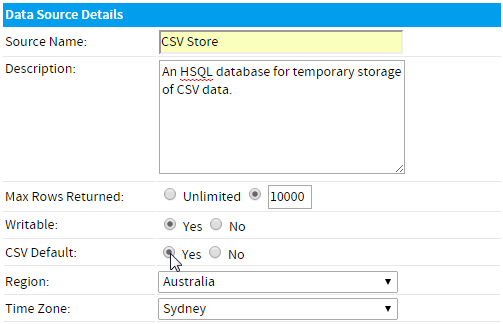
Writable HSQL Data Source

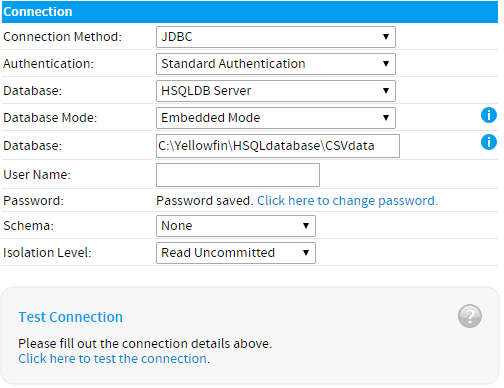
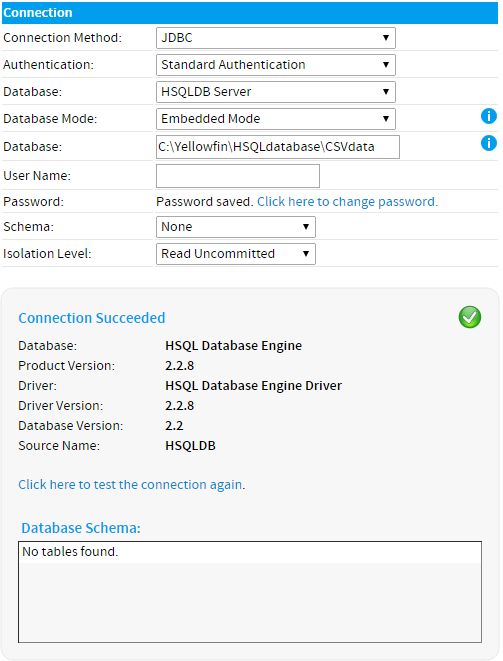
Often when working outside of a Development, QA, or Production instance of Yellowfin, you may have a need to import CSV files on a temporary or trial basis. An example of this would be trailing CSV file formats on a temporary setup, or perhaps creating sample content in a Proof Of Concept (POC) type scenario. In this situation you may not want, or be able, to set up a stable database for the purpose of storing CSV data. A temporary solution to this would be to create a writable HSQL database, similar to the one you can install Yellowfin into. In order to do this, follow these steps:

Note: HSQL databases are not stable and should never be used as part of a long term solution.

Expand
titleClick to Expand Instructions
  1. Create a directory, within your Yellowfin installation directory, to store the HSQL database. For example:
    C:\Yellowfin\HSQLdatabase
  2. In Yellowfin, navigate to Administation > Admin Console.
  3. Expand the Data Sources section of the Admin Console main panel.
  4. Click the Add button.
  5. Give your data source a Name, Description, and set the Writable option to Yes. You can also set it to CSV Default, this is optional.
    Image Added
  6. Now provide the connection details:
    Image Added
    1. Connection Method: JDBC
    2. Authentication: Standard Authentication
    3. Database: HSQLDB Server
    4. Database Mode: Embedded Mode
    5. Database: C:\Yellowfin\HSQLdatabase\CSVdata
      The value of this should be the directory you wish to store the HSQL database in, created in step 1, followed by the name of your database (Yellowfin will create this) - in this example we used CSVdata as the name.
    6. Username: leave this blank
    7. Password: leave this blank
    8. Schema: None
    9. Isolation Level: Read Uncommitted
  7. Now click the Click here to test the connection link to test out your settings.
    Image Added
  8. Complete the process by clicking the Save button at the bottom of the page.

Role Permissions

In order for a user to import CSVs in Yellowfin they must have the appropriate role permissions defined. As there are two methods of importing CSVs, there are also two sets of role permissions available.

...