Page History
...
| Table of Contents | ||
|---|---|---|
|
...
概要
| Styleclass | ||
|---|---|---|
| ||
Customisation of the standard Yellowfin Login Page can be performed two ways:
- Simple - this involves the replacement of images, and changes to the CSS files used by the standard login page, without having to write a custom page. Generally this option is used for quick 'mock ups' but not the final restyled product.
- Complete - this involves writing a custom .jsp file to replace the standard page. This method requires more technical knowledge, and more time.
標準のYellowfinログインページのカスタマイズは次の2つの方法で実行できます。
- シンプル - イメージの置き換えおよび標準のログインページに使用されているCSSファイルの変更を伴います。カスタムページを記述する必要はありません。一般的に、このオプションは簡易的なモックアップに使用され、スタイルが変更された最終版としては使用されません。
- 完全 - 標準のページと置き換えるカスタムの.jspファイルの記述を伴います。この方法は高度な技術的知識および時間を必要とします。
シンプル
...
| Styleclass | ||
|---|---|---|
| ||
一時的なカスタムログインページを簡易的に作成する場合、Yellowfinの「ROOT」の「customimages」ディレクトリ(YellowfinIf you wish to create a quick, temporary custom login page, simply replace the following images, by placing new versions with the same file name in the Yellowfin ROOT customimages directory (Yellowfin\appserver\webapps\ROOT\customimages) with your customised versions:customimages)で、同じファイル名を持つ新しいバージョンを配置して、以下のイメージをカスタマイズしたバージョンと置き換えます:
- logo.png
- yellowfin_welcome.png
- logoFooter.png
- nav_bkg.png
You will need to clear your browser cache once replacing these images in order for them to appear.
Note: the images you wish to use as replacements will need to have the same name as the files listed above in order for the page to pick them up. You no longer have to overwrite the originals, simply place your new images in the custom directory. This will mean that they will not be overwritten during the upgrade process.
Example
これらのイメージを置き換えたら、新しいイメージが表示されるようにブラウザーのキャッシュをクリアする必要があります。
注意: 置き換えとして使用するイメージは、上記のファイルと同じ名前にしてページで使用されるようにする必要があります。オリジナルを上書きする必要はなく、単に新しいイメージをカスタムディレクトリに配置します。これにより、新しいイメージはアップグレードプロセス時に上書きされません。
例
コンポーネント | 標準ログイン | カスタムログイン |
|---|---|---|
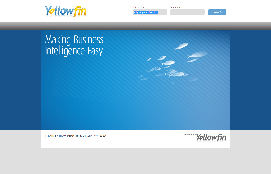
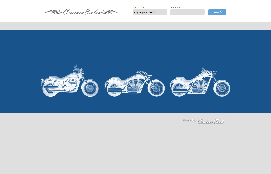
ページ全体 | ||
Component | Standard Login | Custom Login |
Full Page | | |
logo.png | | |
yellowfin_welcome.png | | |
logoFooter.png | | |
nav_bkg.png | | |


...
完全
| Styleclass | ||
|---|---|---|
| ||
完全に新規な状態から開始するのではなく、Yellowfinインストールの開発例ディレクトリ(YellowfinInstead of starting completely from scratch, a copy of the current login page jsp can be found in the development examples directory of your Yellowfin installation (Yellowfin\development\examples\index_mi.jsp). This will give you a starting point, providing the javascript required for the login itself, and allowing you to change the layout however required.
Instructions
jsp)にある現行のログインページjspのコピーを使用できます。このコピーを使用してカスタムログインページの作成を開始できます。このコピーにはログイン自身に必要なJavascriptが含まれ、必要に応じてレイアウトを変更できます。
作成方法
初めに、ログインファイルの名前をindex_mi.jsp以外のファイル名に変更します(例:login_companyName.jsp)。次に、このログインファイルをYellowfinの「ROOT」ディレクトリ(YellowfinFirstly, you will need to rename the login file to something other than index_mi.jsp, for example login_companyName.jsp. You will then need to place your login file in the Yellowfin ROOT directory (Yellowfin\appserver\webapps\ROOT).
In order to ensure Yellowfin uses this file instead of the standard option, you will need to complete the following while Yellowfin is not running:
ROOT)に配置します。
Yellowfinが標準オプションではなくこのファイルを使用できるようにするには、Yellowfinが実行していない状態で以下の手順を実行する必要があります。
- Yellowfinを終了します。
- Stop Yellowfin
- Locate the
web.xmlfile found in Yellowfin\appserver\webapps\ROOT\WEB-INFINF内に存在するweb.xmlファイルを見つけて次の場所を特定します。 and locate the following:Code Block language html/xml <!-- The Welcome File List --> <welcome-file-list> <welcome-file>index_mi.jsp</welcome-file> </welcome-file-list>
- Update the welcome-filefileノードを、新しいログインページの名前を参照するように更新します。例: node to reference your new login page's name. For example:
Code Block language html/xml <!-- The Welcome File List --> <welcome-file-list> <welcome-file>login_companyName.jsp</welcome-file> </welcome-file-list>
- Save the changes to the web.xml.xmlへの変更を保存します。
- Update the welcome-filefileノードを、新しいログインページの名前を参照するように更新します。例: node to reference your new login page's name. For example:
- 新しいログインページを編集します。indexEdit your new login page, locating any references to index_mi.jspjspへの参照をすべて特定し、新しいログインページ名に更新します。例:
- 次の参照を更新します。
- This
Will become これを、次のように更新します。Code Block language javascript <input type="hidden" name="<%=Const.INDEX_PAGE%>" value="/index_mi.jsp" />
Code Block language javascript <input type="hidden" name="<%=Const.INDEX_PAGE%>" value="/login_companyName.jsp" />
- また、次の参照も更新します。 And this
Will become これを、次のように更新します。Code Block language javascript Const.INDEX_PAGE +"=/index_mi.jsp"
Code Block language javascript Const.INDEX_PAGE +"=/login_companyName.jsp"
- Save the changes to your login page.
- ログインページへの変更を保存します。
- ユーザーがログアウトした場合に、初回のログインと同様にカスタムログインページが使用されるようにするには、Yellowfin構成データベースの変更が必要です。データベース内で以下のように変更を行います。
- 「Configuration」テーブルで、ConfigCode
- In the
Configurationtable, locate the record where ConfigCode = 'LOGONPAGE' and update the ConfigData となっているレコードを特定し、次のようにConfigData = 'login_companyName.jsp' using: に更新します。Code Block language sql UPDATE dbo.Configuration SET ConfigData = 'login_companyName.jsp' WHERE ConfigCode = 'LOGONPAGE'
- Restart YellowfinYellowfinを再起動します。
...
例
コンポーネントComponent | 標準ログインStandard Login | カスタムログイン |
|---|---|---|
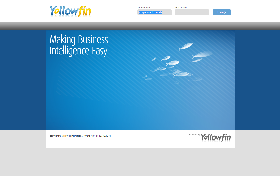
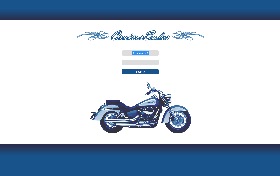
Full Page | | |
| horizontalrule |
|---|
| Styleclass | ||
|---|---|---|
| ||