Page History
| Anchor | ||||
|---|---|---|---|---|
|
| Table of Contents | ||
|---|---|---|
|
...
概要
| Styleclass | ||
|---|---|---|
|
...
Yellowfin provides you with the capacity to export all your content definitions including the related entities from one instance of Yellowfin (e.g. QA) and import these into a separate instance (e.g. Production).
Note: When exporting definitions from Yellowfin there are certain limitations. You cannot export security settings that relate to individual users, only group or roles. These will have to be reset when importing them into the new instance of Yellowfin. Source filter information will be exported but only if it is a scheduled SQL query. Manual records and data file records will not be exported. This is because it's assumed that users will differ between instances, but groups and other structures will be the same.
Content Dependencies
When exporting content, it's important to not only select the items you wish to export, but also all other items the main content may depend on to work.
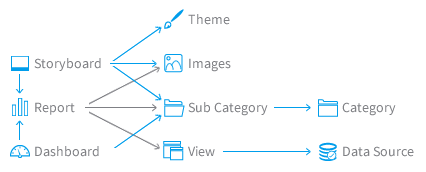
Yellowfin's content dependency structure is illustrated below.
For example, if you are exporting a Report you will need to either:
- include all images it uses, the category and sub category it's stored in, and the view and source connection it's based on, or
- ensure all the items above are already available in the instance you plan on importing the item into
Database Independence
If you are using the export and import functions to migrate Yellowfin across platforms then you will have to be mindful of any hard coded SQL. Examples of this may be:
- Created Virtual Tables within the View
- Freehand SQL Calculated Fields in the View
- Freehand SQL Reports
- BIRT or Jasper reports with platform specific SQL
Yellowfin cannot test for these SQL anomalies and you should test your export and import processes across platforms in your test environment prior to migrating into production.
...
注意: Yellowfinのエクスポート機能には、制限事項として、個々のユーザー、グループ、またはロールに関連するセキュリティ設定をエクスポートすることはできません。エクスポートファイルをインポートしたとしても、これらは、Yellowfinの新しいインスタンスに再設定する必要があります。ソースフィルターの情報は計画されたSQLクエリーの場合のみエクスポートされます。また、手入力したレコード、データファイルをアップロードしたレコードはエクスポートすることはできません。これは、ユーザーはインスタンス間で異なっても、グループやその他の構造は同じであるという想定に基づいています。
異なるインスタンス間でエクスポートしたコンテンツをインポートする場合、それぞれのインスタンスのYellowfinのバージョンとビルドは必ず同じでなければなりません。Yellowfinのバージョンとビルドは、システム情報から確認することができます。
また、CSVインポートによって作成したコンテンツは、エクスポート・インポートに対応していませんので、コンテンツを再作成するようにしてください。
コンテンツの従属関係
| Section | ||||||||||
|---|---|---|---|---|---|---|---|---|---|---|
|
データベースの移行
Yellowfinを異なるプラットフォームに移行するためにエクスポート機能およびインポート機能を使用する場合、SQLのプラットフォームに依存する部分についての知識が必要になります。たとえば以下のようなケースです。
- ビュー内で作成されている仮想テーブル
- ビュー内のフリーハンドSQLによる計算フィールド
- フリーハンドSQLによって作成されたレポート
- プラットフォーム固有のSQLを持つ、BIRTまたはJasperレポート
Yellowfinはこれらに含まれるプラットフォームに依存するSQLをテストすることができません。管理者はシステムを実装環境に移行する前に、必ずテスト環境でプラットフォーム間のエクスポート、インポートのプロセスをテストしてください。
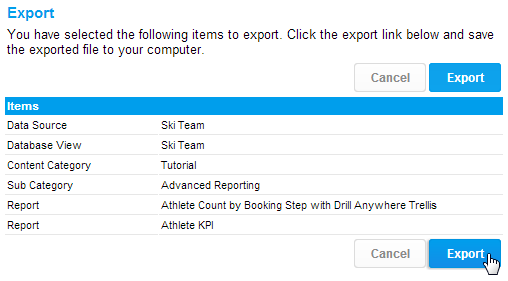
エクスポートプロセス
| Styleclass | ||
|---|---|---|
|
...
| Section | ||||||||||
|---|---|---|---|---|---|---|---|---|---|---|
|
| Section | ||||||||||
|---|---|---|---|---|---|---|---|---|---|---|
|
| Section | ||||||||||
|---|---|---|---|---|---|---|---|---|---|---|
|
| Section | ||||||||||
|---|---|---|---|---|---|---|---|---|---|---|
|
| Section | ||||||||||
|---|---|---|---|---|---|---|---|---|---|---|
|
...
インポートプロセス
| Styleclass | ||
|---|---|---|
|
...
| Section | ||||||||||
|---|---|---|---|---|---|---|---|---|---|---|
|
| Section | ||||||||||
|---|---|---|---|---|---|---|---|---|---|---|
|
| Section | ||||||||||
|---|---|---|---|---|---|---|---|---|---|---|
|
| Section | ||||||||||
|---|---|---|---|---|---|---|---|---|---|---|
|
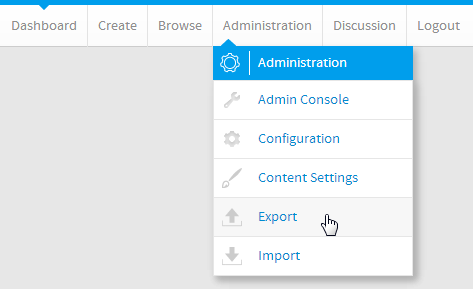
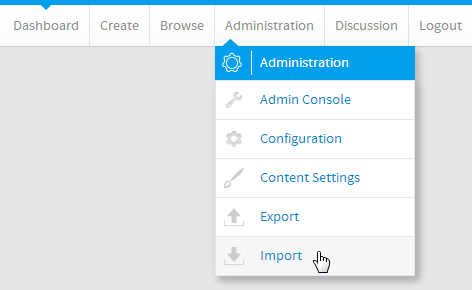
- To import definitions into Yellowfin click on Administration > Import in the main navigation menu.
- Select the exported XML file from your file server by clicking the browse button and using the file upload form to select the appropriate file. Click next to continue.
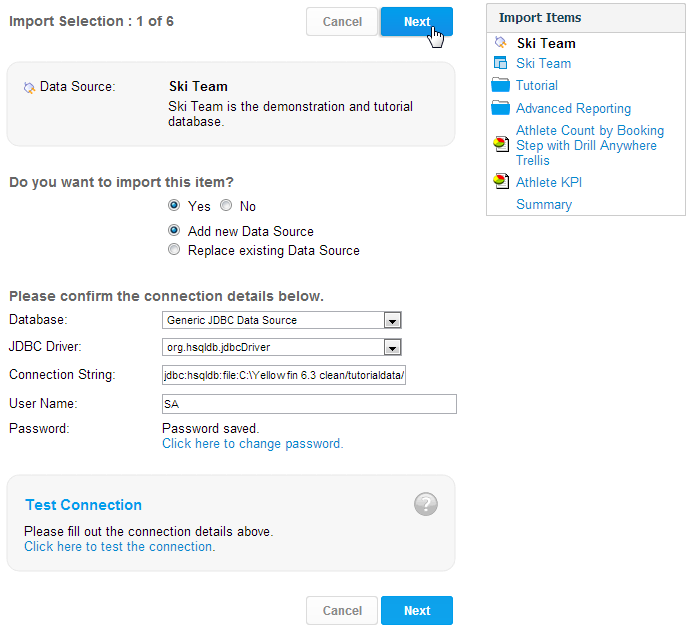
- Yellowfin will now display each element in the import file on the right hand side of your screen and provide you import options in the central form on your screen.
You can choose to import or skip any item in the import file. If you skip dependent items such as a data source for a report then Yellowfin will prompt you to select the appropriate substitutes for those specific items.
Choose your import options for each item and click next to navigate through all the items in the file until you reach the summary.
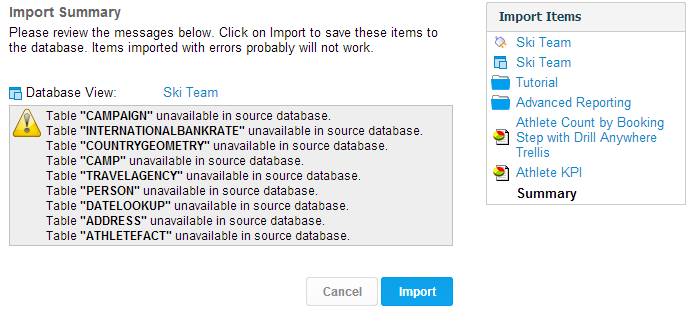
- On the summary - if all items have been processed correctly - you can click Import to complete the process. If an error has been detected Yellowfin will display the error message for the problematic artefact. You can choose to continue to Import or fix the issue and begin the process again.
| horizontalrule |
|---|
| Styleclass | ||
|---|---|---|
|
...


