Page History
| Anchor | ||||
|---|---|---|---|---|
|
...
概要
| Styleclass | ||
|---|---|---|
| ||
An Administrator User is created by default during the installation process. This user has access to all the functions required for this evaluation including administration and reporting functions.
管理者ユーザーは、インストールプロセス中にデフォルトで作成されます。このユーザーは、管理機能およびレポート機能を含むこの評価に必要なすべての機能にアクセスできます。
オプション | 値 |
|---|---|
ユーザー名 | |
Option | Value |
Username | |
Password (default)パスワード(デフォルト) | test |
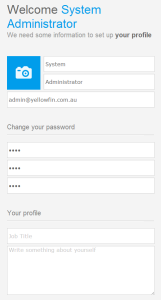
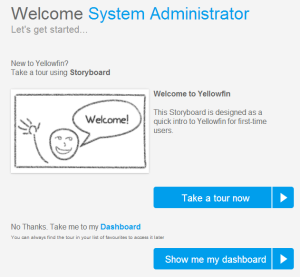
初回ログイン
First Login
| Styleclass | ||
|---|---|---|
| ||
| Section | |||||||||||||||||||||||
|---|---|---|---|---|---|---|---|---|---|---|---|---|---|---|---|---|---|---|---|---|---|---|---|
|

| Section | ||||||||||
|---|---|---|---|---|---|---|---|---|---|---|
|

| Section | ||||||||||
|---|---|---|---|---|---|---|---|---|---|---|
|
| Section | ||||||||||
|---|---|---|---|---|---|---|---|---|---|---|
|

| Section | ||||||||||
|---|---|---|---|---|---|---|---|---|---|---|
|
| Section | ||||||||||
|---|---|---|---|---|---|---|---|---|---|---|
|
...
追加情報
| Styleclass | ||
|---|---|---|
| ||
| horizontalrule |
|---|
| Styleclass | ||
|---|---|---|
| ||